DIY Raised Bed

Share!

how to build a DIY raised bed cheaply in 2021
Cute daughter with a beautiful DIY raised bed!

This post may contain affiliate links, which means we may receive a commission, at no extra cost to you, if you make a purchase through a link. Please see our full disclosure for further information.

It has been a long-time dream of mine to one day have a garden and be able to grow some of my own food. Since moving to the milder climate in Kentucky, it really began to seem feasible. However, we bough a property in town which has a sloped gradient on one side and then a mild incline up the far side, creating a bowl for rain water to accumulate in. Between the standing water and the clay composition of our soil, we realized our best option would be to make a DIY raised bed rather than tilling and planting directly in the ground.

But here we are in 2021 with gas prices rising and taking the cost of many products with it – most importantly lumber and building supplies. Our budget for home renovations is quickly shrinking, so we needed to figure out the most cost effective way to begin raised bed gardening. We scoured the internet for the best information on how to build raised beds, and we ended up using some insight from MK Library, even though we were far from following his plan.

Planning a DIY raised bed

Our first choice would have been wood. But for two 4ft by 8ft beds, we were looking somewhere around $150. The next option we considered was cinder block. Our local Home Depot was out of the usual 8x8x16 blocks when we first looked, but they got some in later at $1.50 each. This method of building beds would have cost us around $120 for two beds. A friend suggested used railroad ties, which I have now heard is bad for growing vegetables in, but they were in the $16-$20 range each, and that was even more expensive than most options. After more research we priced out galvanized corrugated steel siding, and found that we could make two 4×8 beds for $70. Jackpot!

Materials

Here’s a breakdown of what we bought, where we found it, and how much it cost us. While building material prices will differ across the country and as time passes, we are fairly confident that this is hands down the most cost effective way to build raised beds.

diy raised bed tools
diy raised bed materials
  • 3 sheets of corrugated galvanized steel 2’x8′ ($18 each at Lowes – Home Depot was out but theirs were only $12.80 or something!)
  • 2 2″x3″x8′ ($5 at Home Depot)
  • 1 2″x2″x8′ (already had ours but they’re under $3)
  • Metal to metal self drilling screws ($6)
  • Wood screws (already had some)
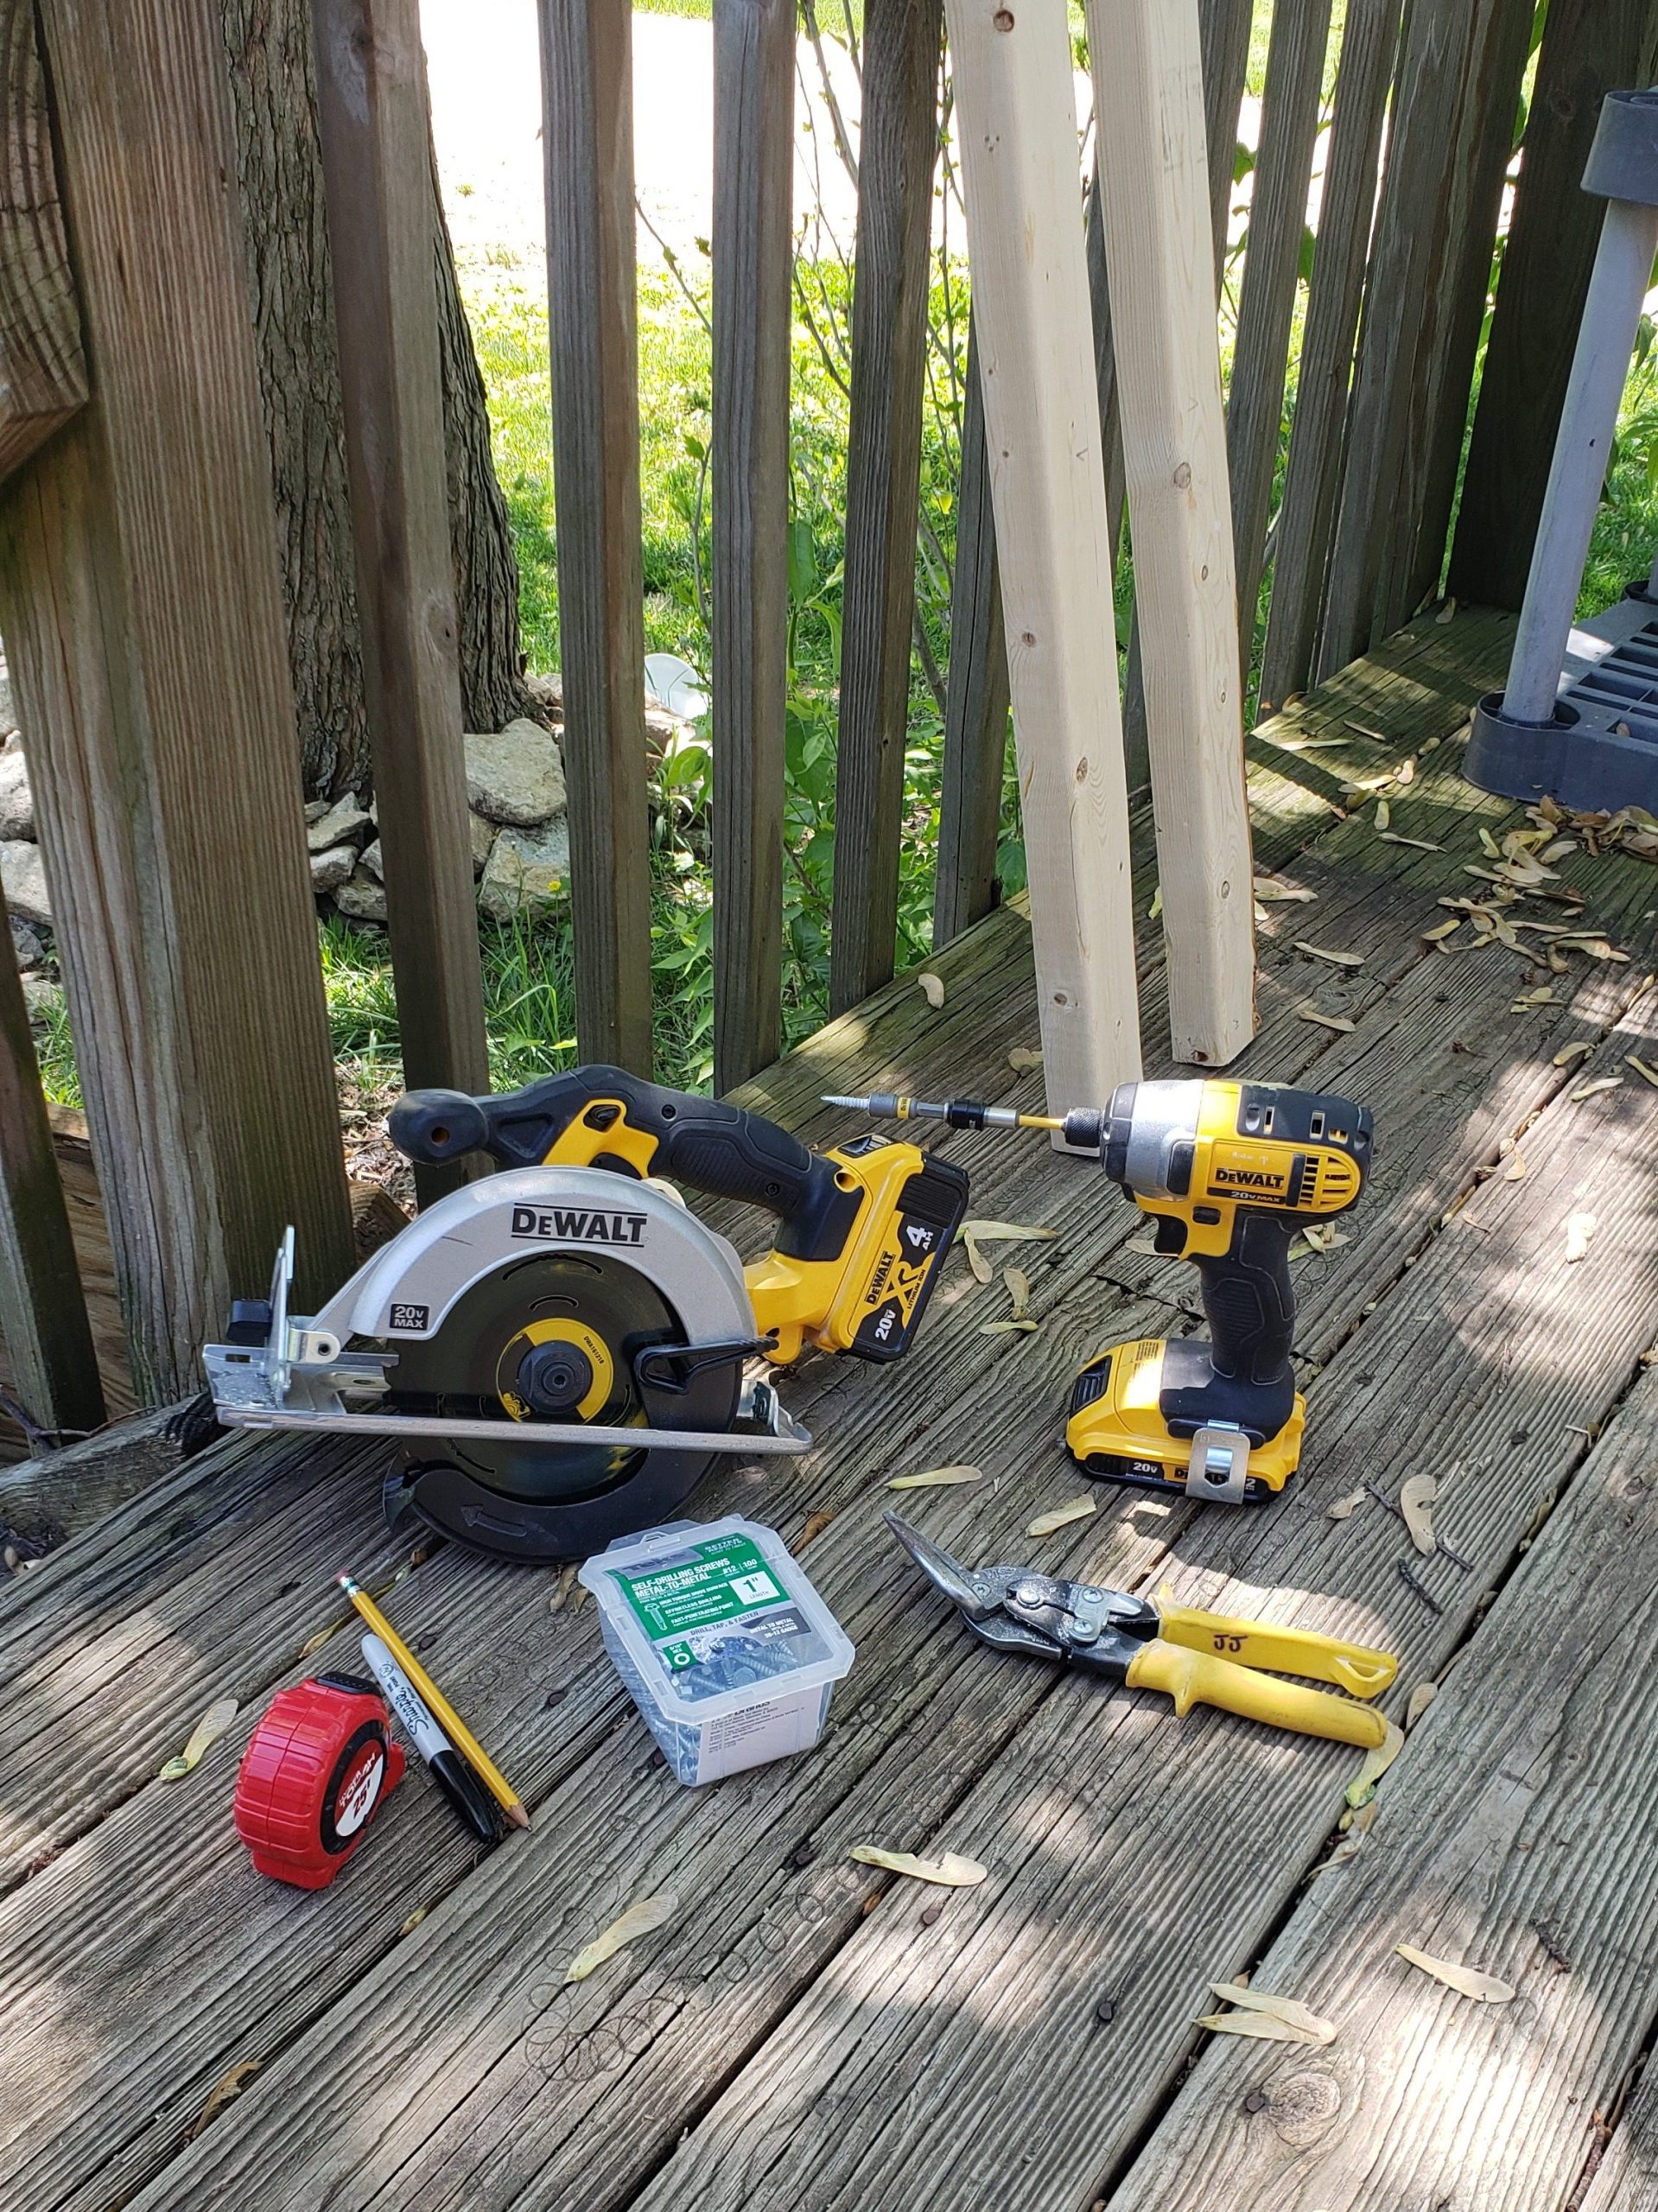
Tools

How to build a cheap raised bed

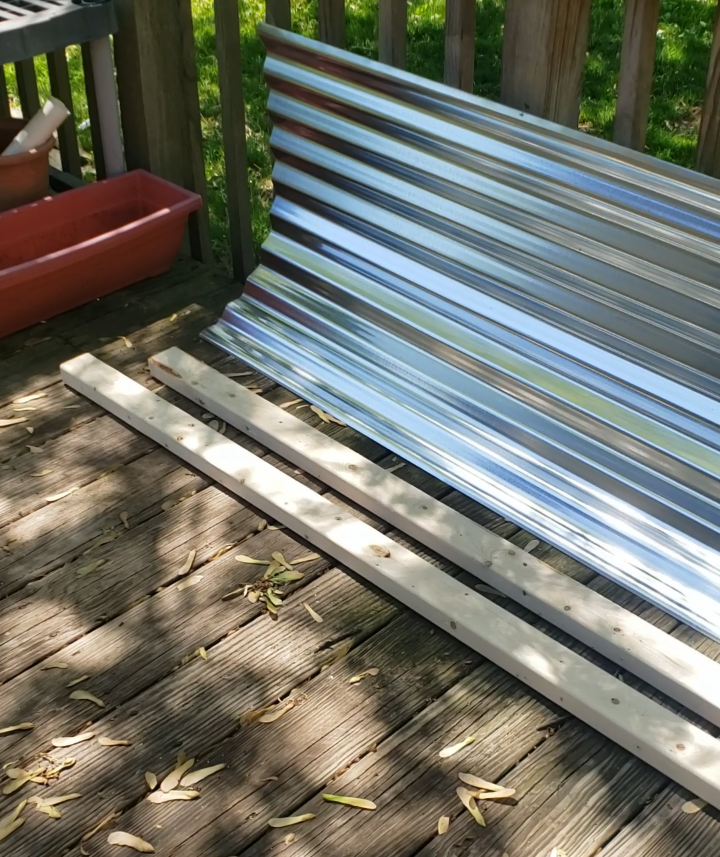
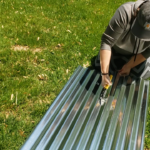
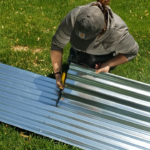
They say to measure twice and cut once, so that’s where I began. I measured and cut our 3 sheets of steel in half long ways first. Then I took one of the three sheets, now cut in half, and cut it in half short ways. At this point we had four 1×8 foot pieces of siding, and four 1×4 foot pieces for the ends of the beds. I wore gloves so I wouldn’t cut myself on sharp edges and took a pair of tin snips to the sheets, and they cut fairly easily. Be warned – the cut edges of corrugated steel are VERY sharp.

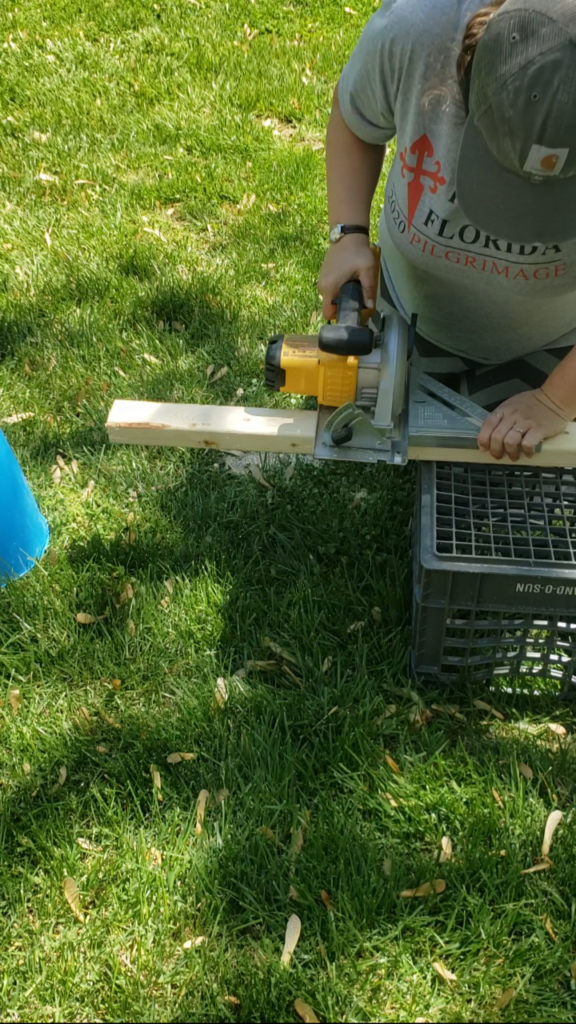
Next I took our Dewalt Skill Saw and cut our two 2x3s into 16 inch segments. I cut them this way so that we can use the excess 4″ of each to “anchor” the bed into the ground by being buried a little below ground level. You could also just cut 12″ segments if you don’t want to do this, and just “set” the beds on level ground.

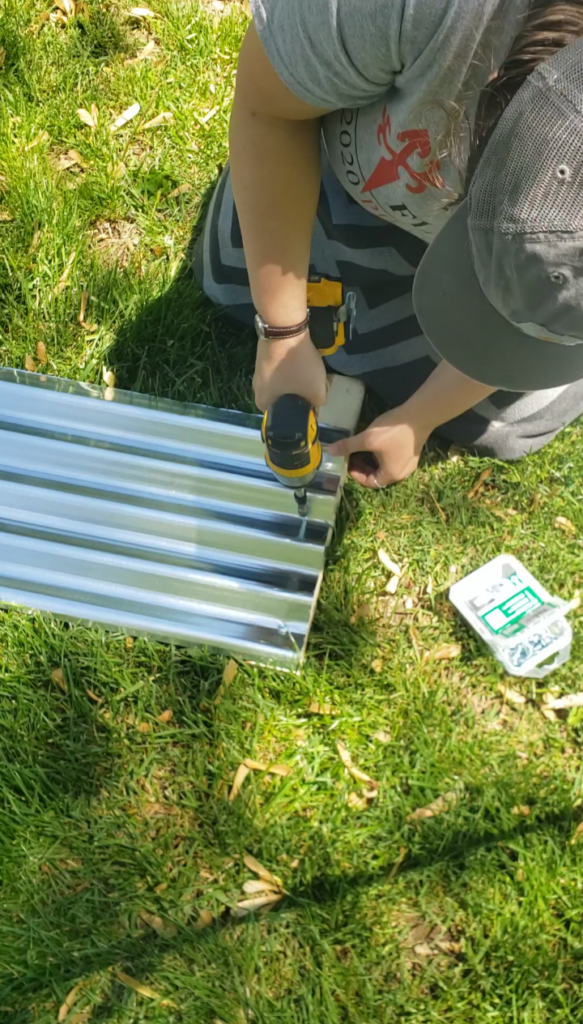
Using self drilling metal to metal screws (Home Depot $6) I attached a 2×3 to each end of an 8 foot piece of sheet metal. Making sure they were on what would become the inside of my raised bed. I attached 8 corner posts in this fashion.

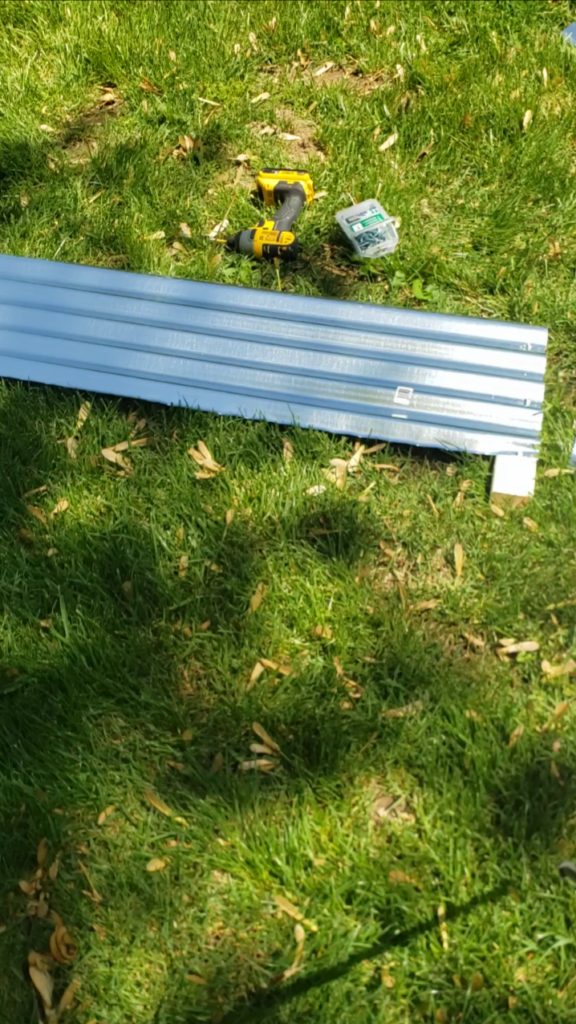
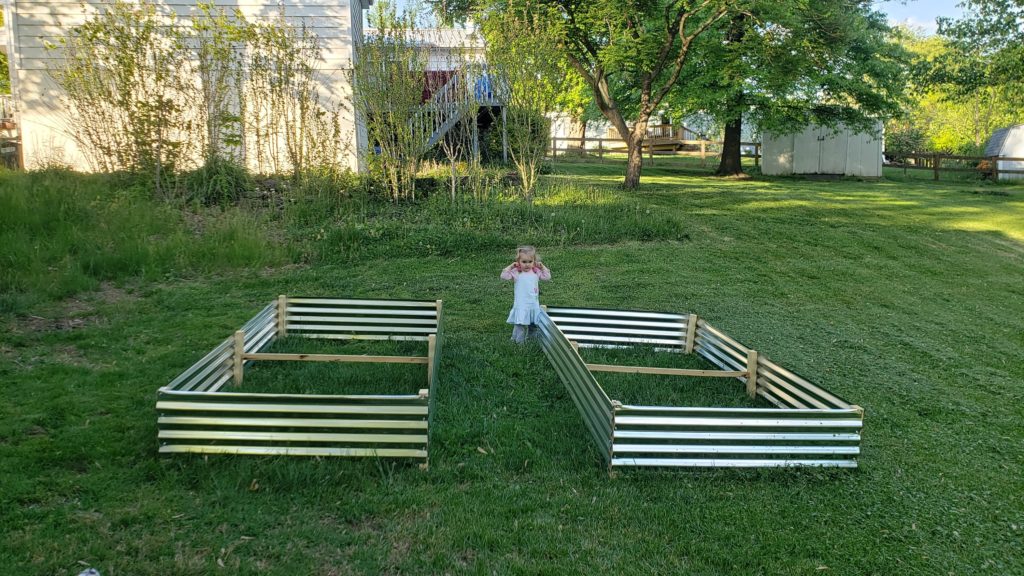
Next, I propped these pieces up and one at a time I lined up the end pieces, and screwed these onto the corner wood posts the same way. Once all eight corners were done, both beds were able to stand unsupported. (Edit: the following is what I added as an unnecessary but helpful component – as it turns out the following instructions are quite necessary in order to prevent the middle of your beds from bowing outwards with the weight of added soil. So, read on!)

Additional tips for your DIY raised bed

Part of the cost effectiveness of this plan is that very little wood is used and there is no wooden frame. However, this decreases the structural stability of the beds and can allow for bowing of the metal over time as the soil in the beds settles and holds water. So my husband came up with a great solution for stabilizing the beds a little more.

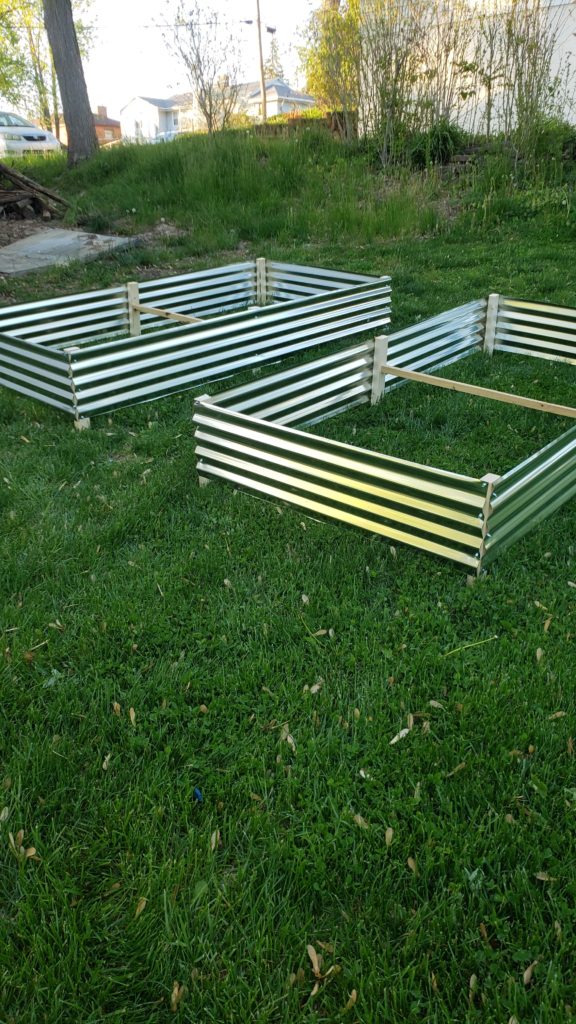
Cutting the wood to 16″ pieces meant there was enough for 6 legs per bed, and we had only used 4 for the corners. Knowing that the beds were 4′ across and I’d be using two 2×3″ posts, I cut a piece of scrap 2×2 we had in the garage to 3’8″ and used wood screws to attach it to the center of the two remaining 2x3s. Then I used more wood to metal screws to attach this little frame to the center of the length of the bed. This way there’s something “pulling” the sides of the galvanized corrugated steel sheets inwards and negating the bowing that could have happened, effectively stabilizing the beds without a real frame. It looked good and seemed effective, so we repeated the process for the second bed.

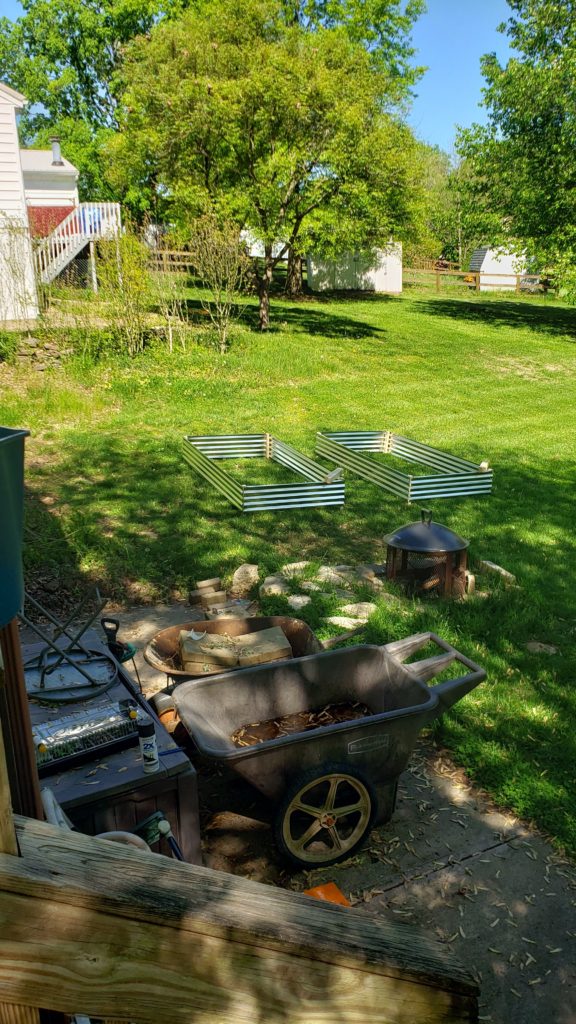
And that was it. We have two 4×8 raised beds ready for soil and planting. Before we fill them with soil we are going to dig into the graded hillside a little so the beds sit close to level without being at the bottom of our little valley. We will hopefully have soil delivered later this week and be able to start transplanting our tomatoes and other vegetables into the beds we just made.

So this is how we built two 4x8ft raised garden beds the cheapest possible way. We’ll keep you updated on how well they hold up! But for now, wish us happy gardening and a green thumb!

PIN for later!

30 Replies to “DIY Raised Bed”

    1. I was a little intimidated too! But once I decided to go for it I didn’t even need my husband’s help in the end and they turned out great, plus it was so much cheaper than any other option! Good luck!

  1. What a great way to make these! I made some year ago from wood. But over time it rotted and bowed out. This looks like a great solution to those problems. Enjoy your fresh food from the garden!

    1. Thank you! We are getting them filled with soil on Friday so we will see how they stand the test of time. I can’t wait to get my veggies transplanted into them!

  2. Wow, I never would have thought to use corrugated steel! What a bargain. I wonder how it affects the soil though, I don’t know much about steel

    Emmeline says:
    1. That was a concern of mine too, especially knowing that even treated wood is not good for growing food. From my very short research the galvanized steel doesn’t have a negative impact on the vegetables unless it is in direct contact, so it doesnt have byproducts that seep through the soil to my knowledge.

  3. Great post! I would love to do something like this, it looks fantastic and great that you’ve been able to save some $$ through the process. Thanks for sharing! x

  4. I own a feed and seed store and we sell a lot of garden seeds and plants. Over the years, I have watched more and more people transition from the typical (in the ground) garden to raised beds. They seem to be easier to maintain. Thanks for sharing your raised bed project. It looks great for planting a garden. DIY projects are awesome.

    1. Its so cool that you own a store like that! As a kid those were my favorite. Every “big town” had one, and going with my dad was the best, we could get lost perusing forever and always left with more than was on the list. This will be my first year of gardening as an adult. All our soil is clay, so it seemed like a good idea to do raised beds. There are so many neat varieties. The north-noth-western Europeans have a way of using mounds of compost in long rows with things planted anywhere in reach. I dont know the name, but they’re very cool looking. I’ve stumbled across apt of neat ideas like that recently.

  5. So smart. I loved teaching my kids to grow vegetables when they were young. Raised beds are the best !

  6. Thank you so much for sharing this! It looks amazing. I need to make this happen too, and now I don’t have the excuse that it’s too expensive. Thanks again 😀

  7. Hi! This is great! I am wondering if you have an update of how your galvanized beds held up after a season of gardening? Any updated pictures? I’m considering a few front yard beds for next spring, but I want to make sure they will be pretty for the neighbors after some use.

    Rachael says:
    1. Hi Rachael, thank you for your comment! They held up even better than I anticipated, honestly. Weed wacking around them put some grass stains on parts, but because they’re so reflective, from a distance it just looks like the lawn reflecting on them. I am in the process of tearing down the garden for winter and such (just learning this too!) but I will do a quick recap post with photos soon. If you’d like I’ll come let you know here so you can check it out once its up and you can see for yourself!

      1. How did it work with tearing it down and reinstalling it? Was there a reason that you tore the part for the season? Did you do anything to the top side to make it better as far as safety and cutting yourself when messing around the top edges of it?

        Thanks in advance!
        Keith

        Keith says:
        1. Hey Keith! We didn’t take down or move the beds at all, so they’re still intact and in the same location as where we put them last spring. In fact, not shown in this tutorial, we ended up putting them on a slight hillside and since we didn’t want them tilted to have a nightmare with drainage only on one side, we graded the hill so that they’re sitting level. One side is “buried” almost a foot into the hill while the other end remains fully exposed. So until we sell and move, these guys are staying put! Regarding the top sides, I made sure that each “top” side of the galvanized steel was the factory edge and not the freshly cut sharp edges I had cut when making these. The factory edges aren’t sharp, so there haven’t been any incidents of cutting ourselves, even with our kids playing around them. All the edges I cut are the ones facing the ground to avoid that exact issue. Hope that answers your questions! These have held up great, and I’ll add some current photos to the bottom of this post as soon as I get a chance. Thanks for stopping by and commenting!

  8. How did you prep the ground before you started growing? Did you pull the existing grass, etc. and layer with paper, cardboard, or mulch before dirt filling? My husband and I recently moved into a home that has an existing small garden. It is VERY sandy. I’ve decided to convert to raised beds. And am curious about ground prep. An idea for minimizing maintenance around your beds could be to remove 18″-24″ of grass from around the beds, laying lawn fabric/plastic (to reduce/minimize weeds), then topping with your choice of mulch. For added mulch protection, you could use landscape edging.

    Heather Rae says:
    1. Hi Heather! We have these beds on the side of a small hill, so in order to reduce runoff we had to dig into the hill to grade it out so the beds would sit flat. Because of that we basically had to dig down up to a foot to sink one side of the beds, so it was just loose soil. I was running late into my growing season so I also didn’t have much time for sourcing materials so after that we just dumped a ton of local top soil in to fill the beds and I used a little mulch on top for water retention. Unfortunately much like our own soil the local top soil is about 80% clay so I actually envy a sandier soil and will be looking into mixing more sand into my soil this year to help my roots go deeper. And yes, our plan was to lay fabric and then mulch or pebbles to minimize weeds and lawn maintenance around the beds but that is still a pending project!

  9. ALWAYS make Lowes price match Home Depot (and vice versa). I look up at both stores the price on what I’m buying, and neither of them has ever not price matched the other for the same product. Saves me a trip.

    Cool beds. I’m looking to build some at our new home. I would have preferred cedar, but it’s a little dear right now, so I think I can cut the costs by going galvanized. Thanks!

    Holly D Hudnall says:
    1. Thanks for the tip, Holly! I had no idea they honored price matching but I will definitely be doing that in the future! We wanted cedar for our beds too but between cost and lumber shortages when we were building it wasn’t in the cards. Maybe that’ll be different whenever we finally get on more acreage one day. Here’s hoping. Glad this post gave you some ideas!

  10. This looks like it would work for me, nothing wrong with wood, but metal won’t deteriorate over time, and i would rather take metal sheets home over heavy wood.. thank you

    christine says:
  11. How did you keep from hurting yourself on the cut steel with planting and everything?

    Kelly says:
    1. Kelly, I put the cut edges downwards towards the ground so that the upper edge where I’d be reaching while planting and harvesting (or that my kids could touch) was the factory smooth edge. Hope that helps!

  12. I tried this and cutting that tin is for the birds I bought a brand new pair of tin snips and it was still hard to cut. Can’t keep it going in a straight line for nothing. May be cheap to make but ain’t worth the hassle.

    Brenda says:
    1. Hi Brenda. My first few cuts were tricky too. I found that holding one side of the cut up, or down, to open the split of the cut, was very helpful for letting me position the snips where I wanted them. Mine all came out with straight lines and I didn’t use any special tools or anything. I hope that tip helps.

Leave a Reply

Your email address will not be published. Required fields are marked *