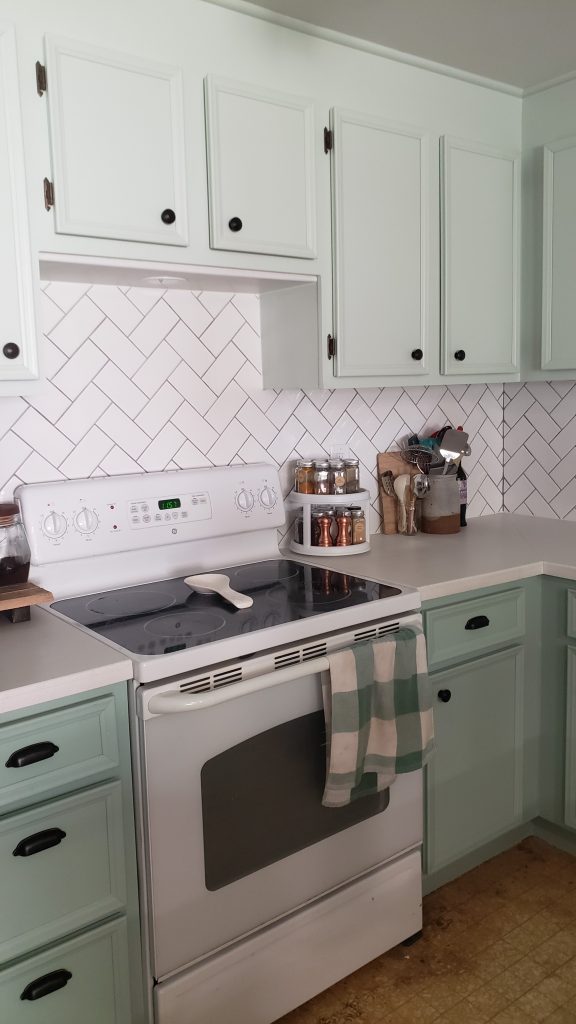
We have halfway tackled another big part of our kitchen renovation – painting kitchen cabinets! Ever wondered how to paint kitchen cabinets with a sprayer? It wasn’t something either of us had done before, but we got a sprayer and dove head first into the job! I say half way done because we’ve only done the upper cabinets so far, and will do the lower cabinets at the same time as we replace our sink and counter tops.
This post may contain affiliate links, which means we may receive a commission, at no extra cost to you, if you make a purchase through a link. Please see our full disclosure for further information.
How to paint kitchen cabinets with a sprayer for beginners
If you’re like us, this project sounded intimidating at first, but it doesn’t have to be. Here are a few quick steps to take and things to consider if you are wondering if you can do this project yourself.
- Decide which paint sprayer is right for you
- figure out if you’ll be doing just the outside, or the inside as well
- make a game plan for covering things and/or a spot to safely paint
- Choose paint
Types of Paint Sprayers
There are different types of paint sprayers and they vary widely in purpose and price. You’ve got little handheld sprayers with a small reservoir you fill with your desired paint. You’ve got paint sprayers that hook up to your air compressor in order to spray. And you’ve got sprayers that have a built in compressor of their own, and you simply put a small hose head into your bucket of paint and begin spraying.
This last variety is the type of paint sprayer we used to paint our kitchen cabinet doors.

Step by step instructions
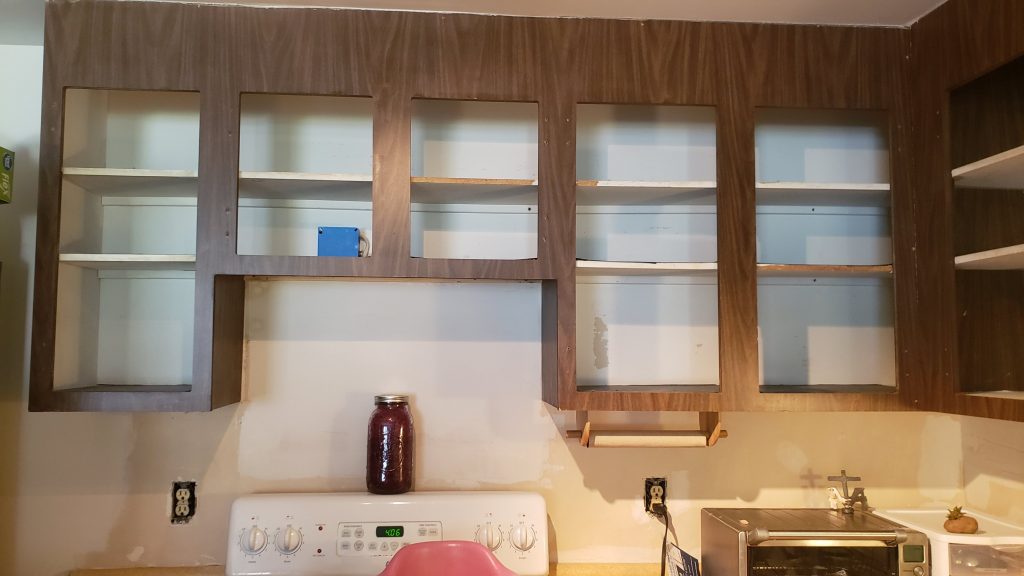
Removing
The first step in painting our upper kitchen cabinets was to remove the doors and the hinge hardware. There were no knobs or pulls to remove, so that made the job relatively easy. Two of our hinges had screws whose heads were stripped, so that took a little longer to remove. But overall this is an easy part of the process.
We put these screws and hinges in a small glass bowl and filled it with white vinegar to begin pulling the buildup of grease and grime off of them for a thorough cleaning. Do not leave them in the vinegar more than a few hours or overnight, as the metal of the hardware can be compromised by leaving it for too long in strong acidic vinegar. Also be sure not to leave them in any amount of water for longer than it takes to rinse and scrub them, as it is very easy for rust to begin.
Cleaning
We then took the cabinet doors outside and scrubbed them down with water and baking soda as a light exfoliant. This cleaned them better than any product I had tried on them for general cleaning over the past few months. I was so relieved to see them so clean, even though it took an absurd amount of time for me to find this easy solution!
Sanding and Preparing
We then used our DeWALT orbital sander (cannot recommend highly enough!) and used a 120 grit sand paper to rough up the cabinet doors just a little bit. This part of the process helps the paint adhere correctly to the doors once you’re finally using your paint sprayer. As a finishing touch, we wiped down the cabinet doors with a light wash of TSP and allowed them to dry. We repeated these same steps – baking soda wash, sanding, and TSP – with the face of the kitchen cabinets as well.
We were also painting the insides of the kitchen cabinets at the same time, though not with a sprayer, so at this point we emptied all of our kitchen cabinets onto a counter and the table (which provides lots of incentive to hurry up and be done so you can put it all away!) and taped off around the ceiling and walls that meet the cabinets.
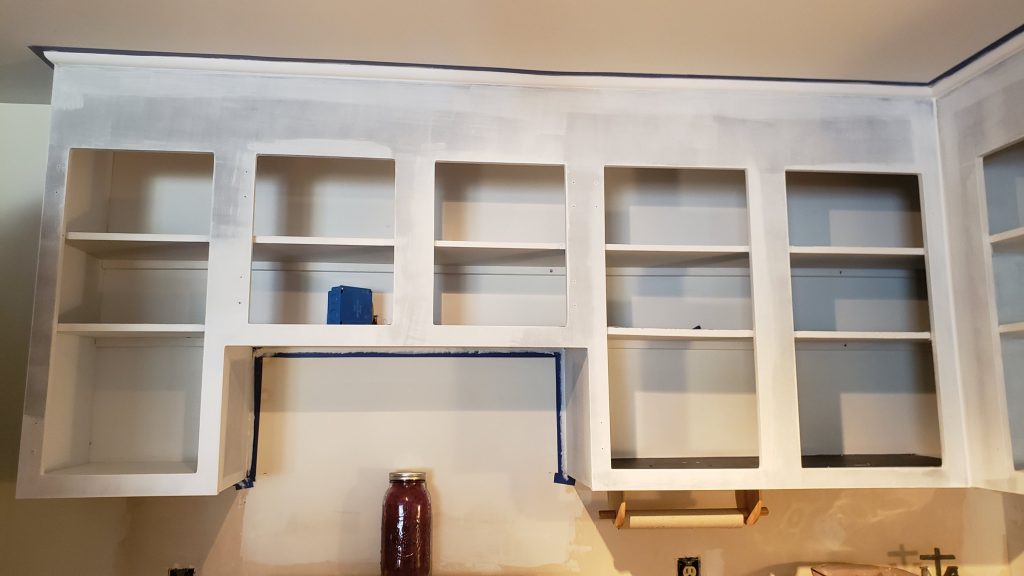
Priming and Painting
Once the cabinet box and doors are ready and prepped for painting, the fun part can begin and the progress seems to go a lot faster. Except for the wait time while things dry, of course.
We cut in with KILZ primer on all the cabinets with a regular cutting in paint brush. Then we used a small foam roller on both the insides and the outsides of the cabinet box. Depending on what color the cabinets were previously and how good of coverage you get with your primer, you may only need one coat of primer before you can begin painting. But if your cabinets started out very dark or your coverage isn’t quite adequate with your primer, then two coats is the best option to be sure you’ll have a smooth, crisp finish to your final work.
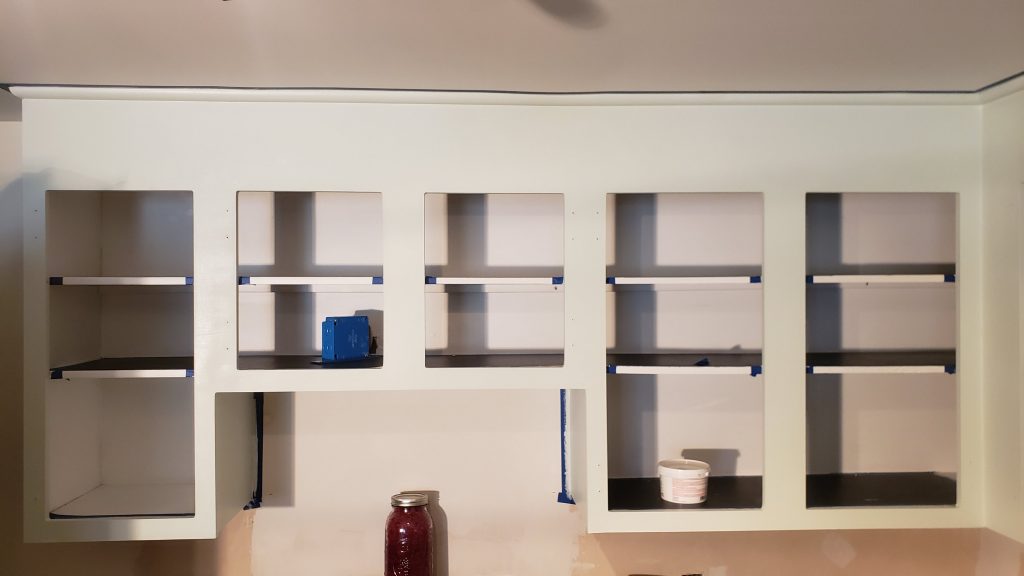
We duplicated this same process for the cabinet box when it came to painting – we cut in with a brush and rolled with a foam roller.
The doors were the real fun part where we got to use a paint sprayer for the first time.
How to Paint Kitchen Cabinets with a Sprayer
The process of using the paint sprayer is the same for the primer as it is for paint. You plug it in, set it up where you want with the bucket of primer or paint beside it. The short hose from the sprayer goes into the bucket of paint, and the sprayer head gets screwed onto the long hose.
Here are some tips to be aware of when painting with a paint sprayer for the first time:
- It is helpful to fire off the sprayer a couple of times before you aim at your piece so you can be sure the paint is flowing and spraying correctly and make any necessary adjustments.
- Keep in mind that a sprayer is flat, not circular, so instead of having a spray like a spray bottle or a regular hose, it sprays in a short line.Be sure that your back and forth movements are perpendicular to the direction of this line so that you get a flat, even coverage!
- Begin to spray before your sprayer is over the object you are spraying, and continue past it as well. In other words, you need to overlap past your edges by a couple of inches to ensure you have even coverage. If you begin your spray while already over your painted piece, that spot will have a lot more paint because you are not yet moving the sprayer when you begin. So long, slow, even, sweeping motions that begin and end beyond the piece you’re painting are ideal.
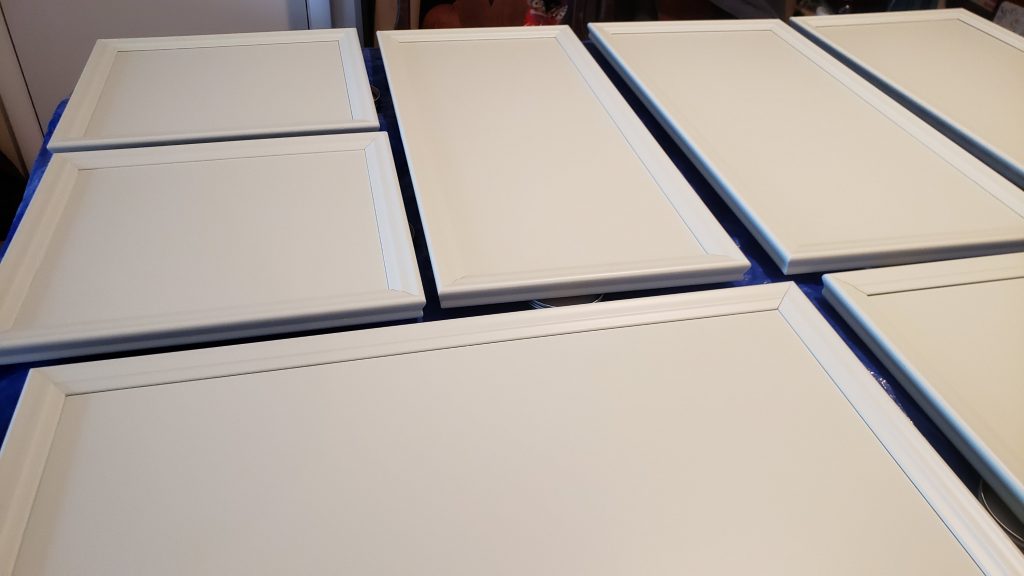
We primed and painted the doors outside on a pair of sawhorses, and then immediately moved them indoors to dry. It was great that they dried fairly quickly so it made the actual paint spraying portion a 2 day project instead of longer.
We set them up on the table and a couple overturned buckets to dry. They rested on a handful of mason jar lid rings so they weren’t flat on anything and were easy to pick up and reposition. I highly recommend having a space set up for drying before you begin. Ours were set up in our dining room kitchen area, which of course is home to our kitchen stove, but also our washer and dryer (it isn’t ideal but that’s how this house was built) so in order to prevent humidity or moisture in the air from damaging or slowing the paint job, we did not cook or wash laundry in the kitchen for most of the duration of this project.
Needless to say, it was a relief to be finished!
Cleaning the paint sprayer
After you finish painting with a sprayer you have to clean it properly in order for it to be usable again and not have residual paint in the hoses or clogging up the inner machinations of the machine.
With this machine, and since we were using a water based latex paint and primer, cleaning was as simple as filling a bucket with warm water and pumping that through the sprayer until the water coming through the sprayer ran clear. This indicated that all the paint had been washed out of the system. There are a couple small filters involved that we also rewashed in the kitchen sink to be sure no paint remained. And that’s it – you’re done!
That was easy!
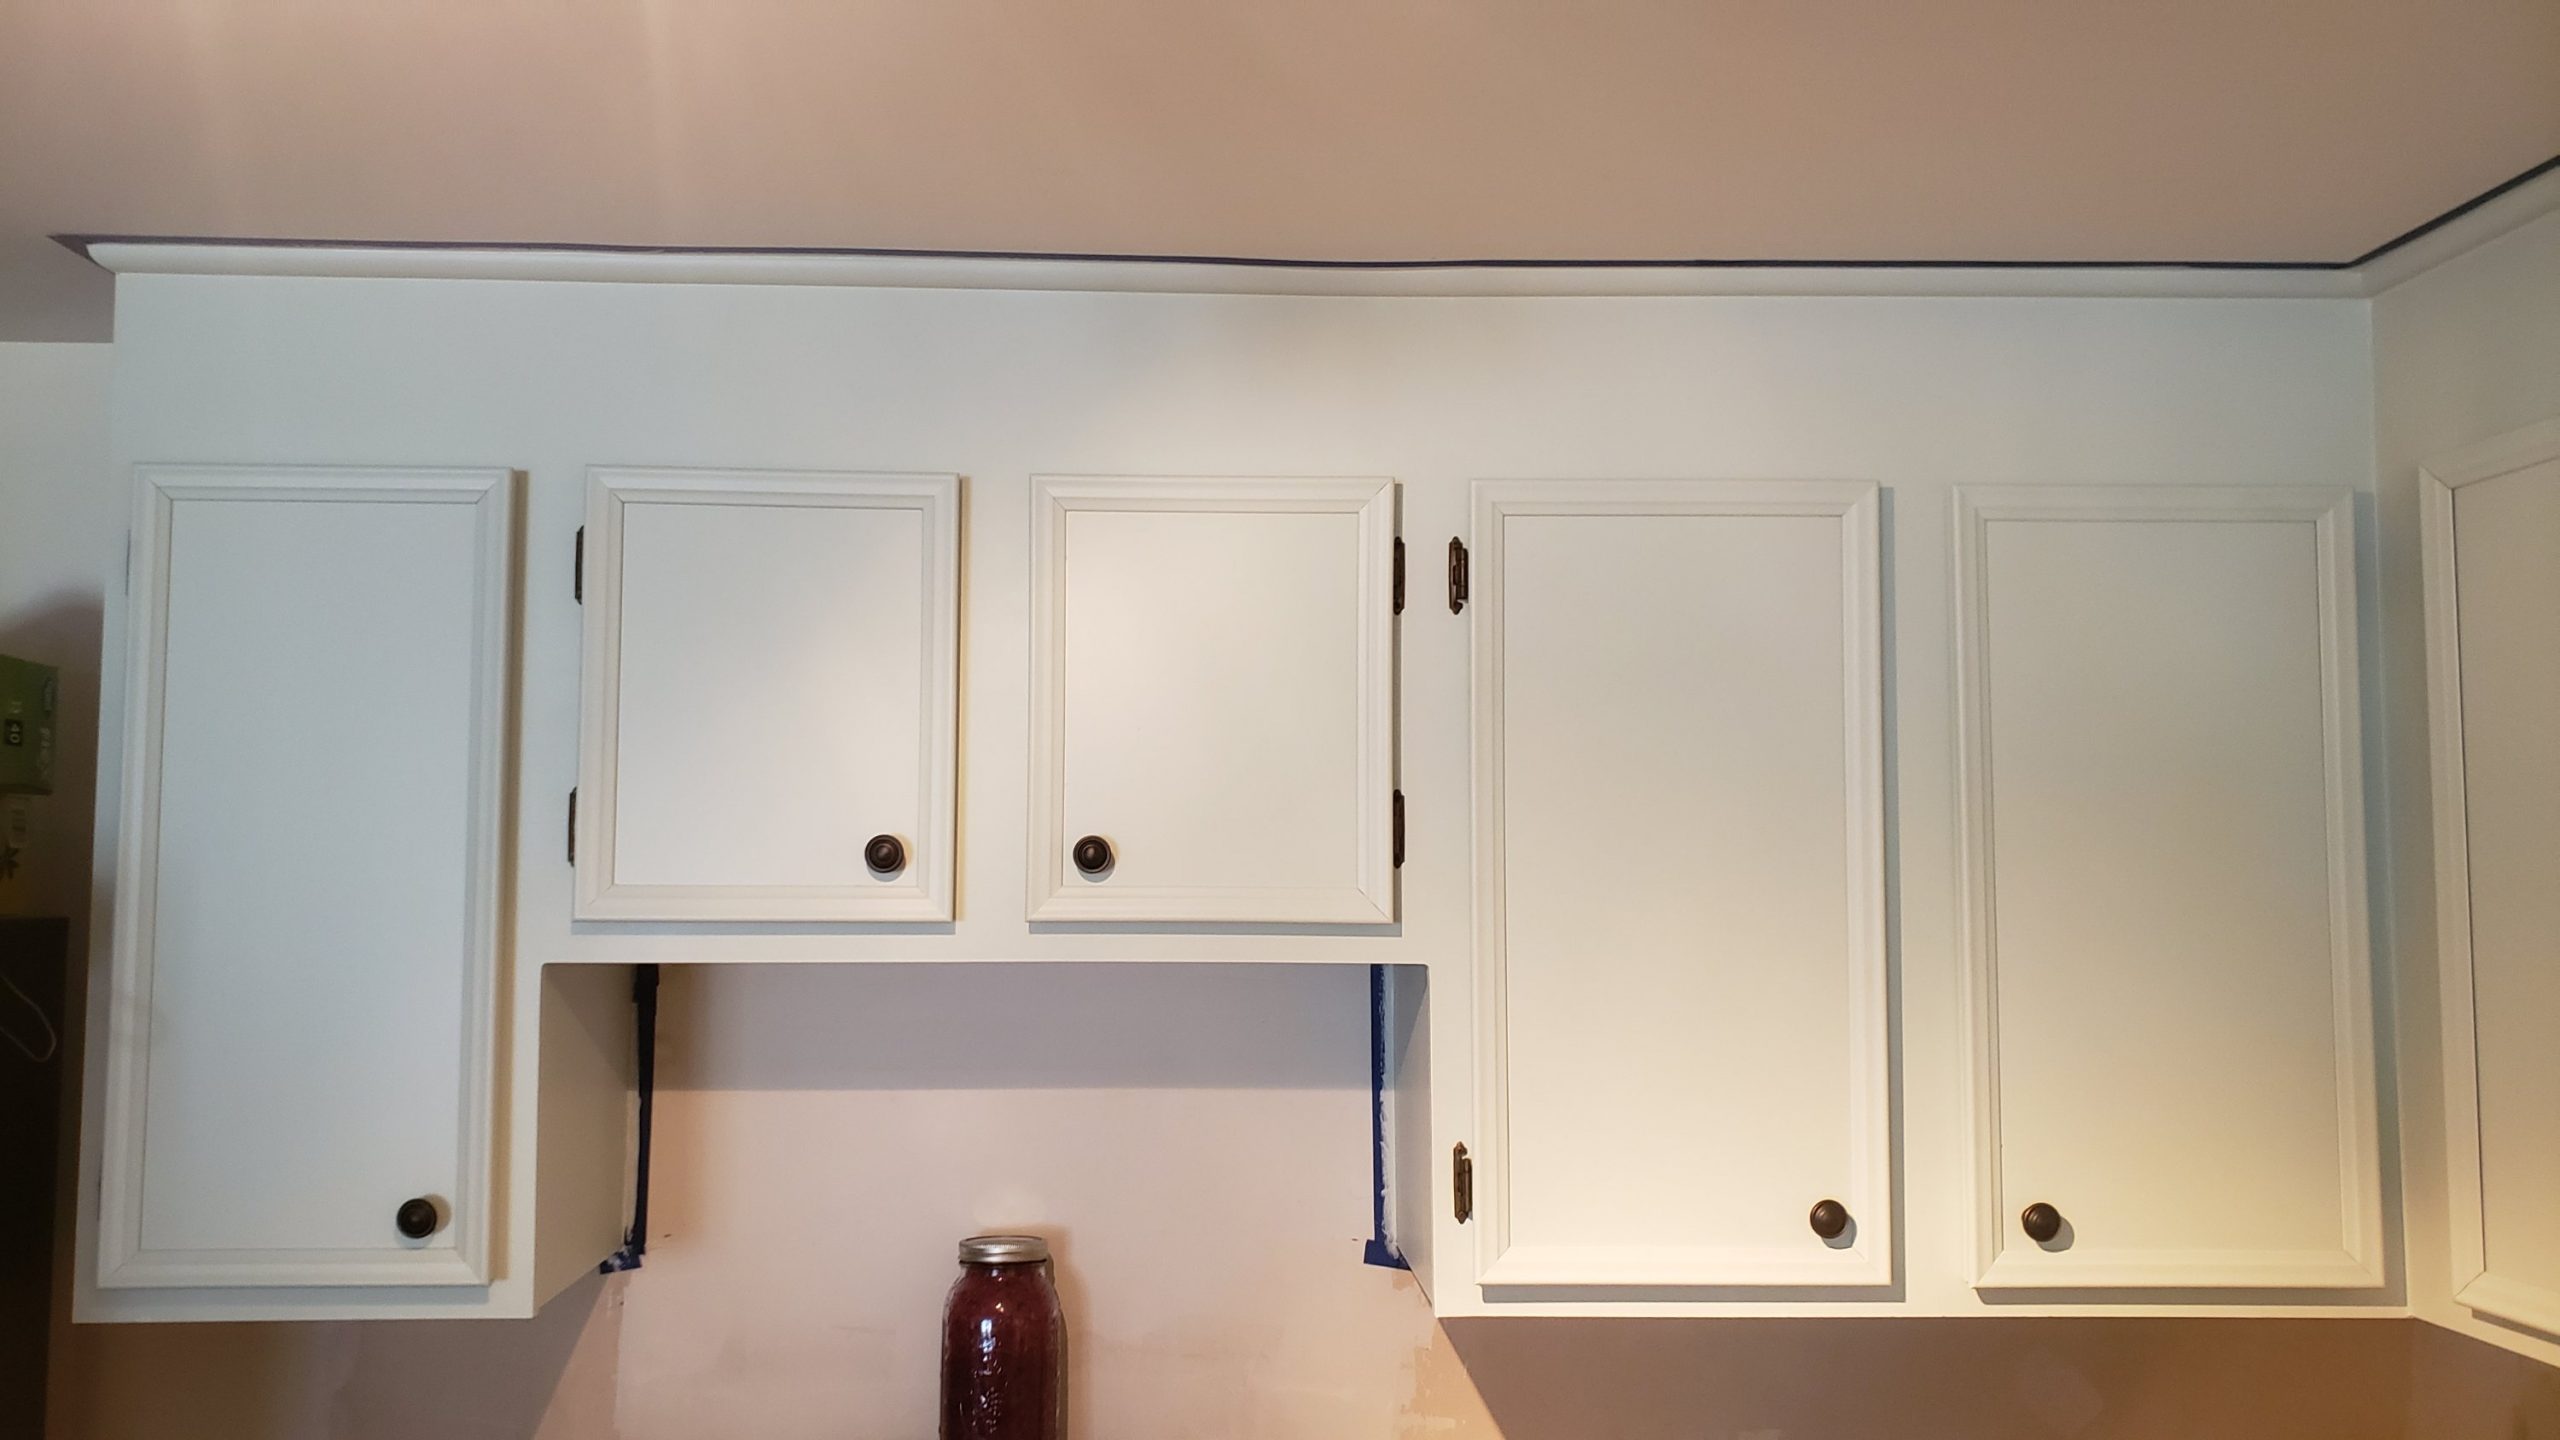
That is really all there is to it! The learning curve was so easy and the outcome was perfection! Our kitchen cabinet doors look professionally painted and so crips and clean!
Using my Wagner paint sprayer to paint a room in my house gave me Carpal tunnel and I couldn’t use my hand for like two weeks because it hurt to move my fingers and the pain went up to my elbow… The fact that you have all that weight and have to pull the trigger the whole time struggling…
Ooh, that sounds painful! We haven’t used it for anything large scale like that, or which necessitates holding and spraying for such a long duration. I’ll keep that in mind. I’m sorry to hear you had a bad experience with it!
Hi, this is a great article! Thanks, and keep on sharing. 🙂
Thanks so much!